Step by Step tutorial for the Toolbox Trumpery project
A step by step tutorial to assist in the making of the Toolbox Trumpery project – the pattern is available for sale here.
For those of you who do better visually when making, follow this along with the instructions in your pattern for a perfect finish.
Complete all embroidery as per the iron on transfer, design sheet and instructions. Press well and trim to size as advised.
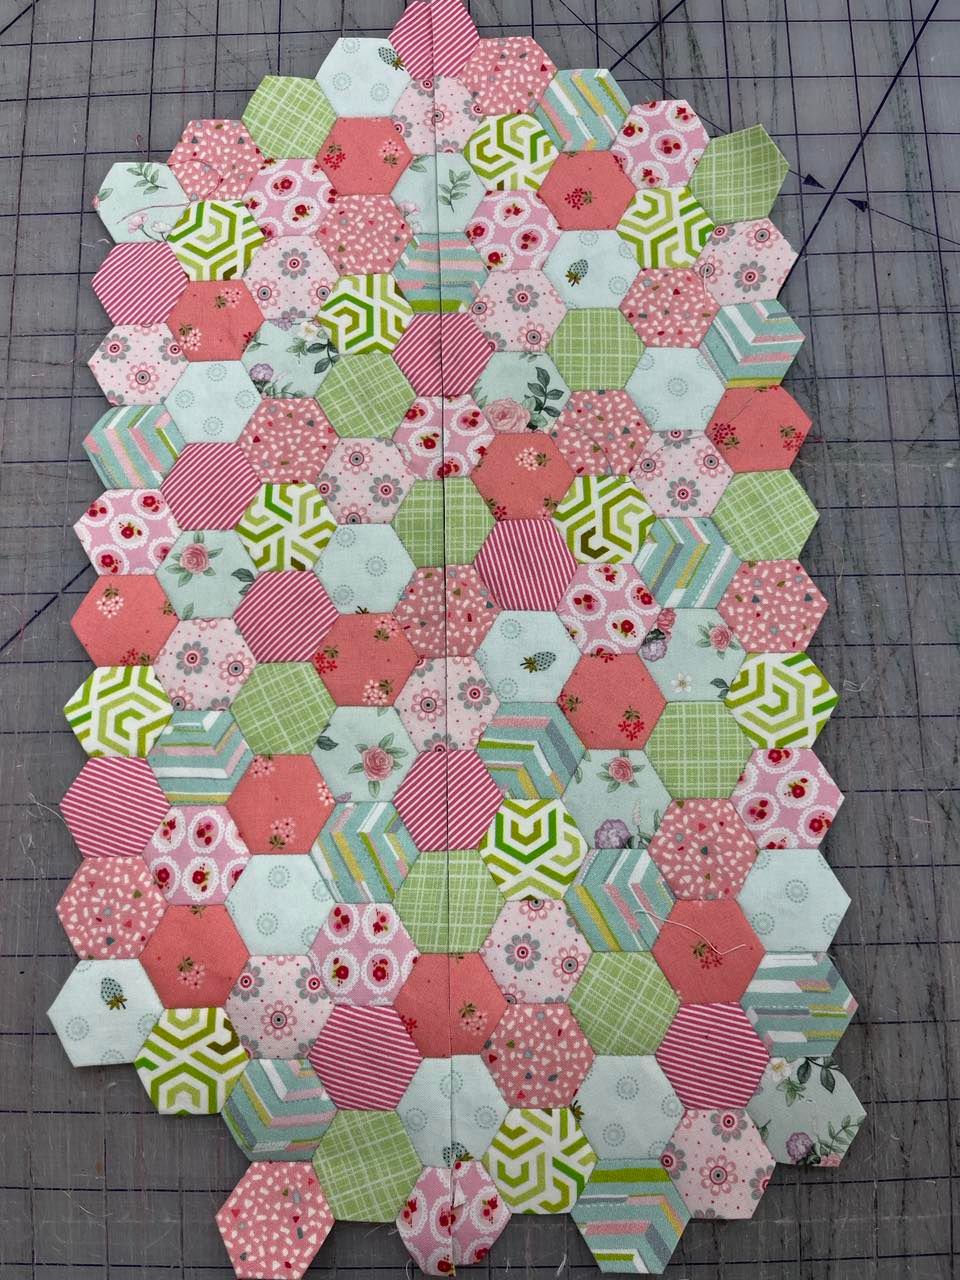
Press your completed hexie panel and using a long ruler and rotary cutter cut it apart directly down the centre.
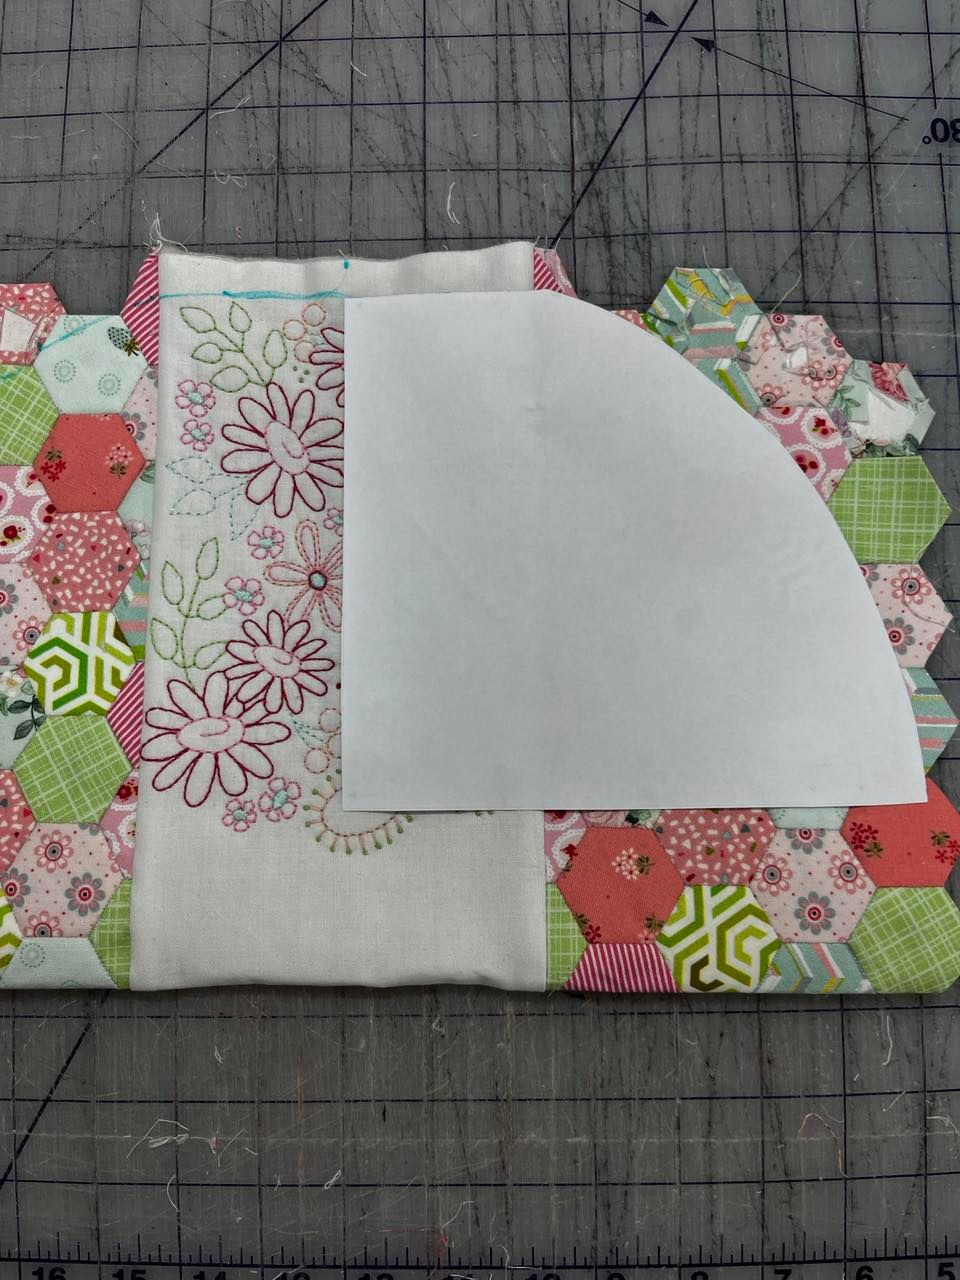
Place your trimmed stitchery panel in the centre – open out the top and bottom seam allowances on the hexies and attach to both sides using a 1/4” seam allowance. Press seams to centre panel
Fold in half wrong sides together. Mark the centre. Place template at centre mark on the top edge. Use a marker to draw around the curved edge.
Flip the template and repeat on the other side.
Use a rotary cutter or scissors and slice off the edges carefully. Use a ruler to continue down the straight edges to the bottom fold.
Lay your panel on top of the lining fabric and fusible lightweight batting and trim both to size. (you can do both layers at once or one at a time)
Fuse batting to wrong side of outer panel. Place right sides together with your lining piece and sew around outside edge using a 1/4” foot and leaving a 3” opening in the centre of one long side.
Clip the curved corners, turn through the opening and press out all seam well and smooth
Open zipper and mark the centre. Place the right side of zipper onto the lining side of your panel having the centres matched and the teeth close to the edge. Use pins, clips or glue to hold around the top edge of the panel on both directions until you get to the ends.
Use a zipper foot on your machine to attach sewing as close to the teeth as possible. I used glue and then stitched from the outside so that I could get an even stitch line showing on the outside of my bag. An awl also helps to move the zip through and keep it right in place near the teeth. Move the zipper pull out of the way as you go.
Repeat for the other side of the zip on the other end of the bag. This one is a bit trickier to sew when you get to the closed end, use the awl to assist.
Turn the bag wrong side out. Open the zip. Position the zipper in the centre and flatten down each end. Use clips or pins to hold it flat and centred. Stitch across each flat end using a 1/4” seam allowance and taking care not to hit any metal parts of the zip. Repeat for both ends. Trim any overhanging zipper.
Place a binding strip right side down on the end having 3/4” overhang at the beginning and end. Stitch with a 1/4” seam. (again be careful not to hit any metal zip parts)
Fold in both ends (use glue to hold) and then double fold the long side in until it meets the stitch line. Glue or clip and then edge stitch into place covering all raw seams.
Turn your bag through the open zipper and push out all corners.
Fill with all of your tools of trade and show it off with pride!